
🤖 Build Your Own Programmable Robotic Arm with Arduino
Bringing Industrial Precision into Your Hands — One Servo at a Time
Have you ever watched an industrial robot move with precision and thought,
“Whoa… can I build something like that at home?”
Well — yes, you absolutely can!
Introducing the Programmable Robotic Arm using Arduino — a DIY project that combines coding, electronics, and robotics into one hands-on learning experience. Whether you’re a student, hobbyist, or maker, this project is your entry into the world of automation and control.
🦾 What Is a Programmable Robotic Arm?
A robotic arm is a mechanical manipulator that mimics the human arm’s motion — rotating at joints, gripping objects, and even performing small tasks like picking, placing, and stacking.
In this Arduino-based version, you’ll control the arm’s movements using:
- Servo motors for joints
- Joystick or programmed instructions
- Arduino board to process commands
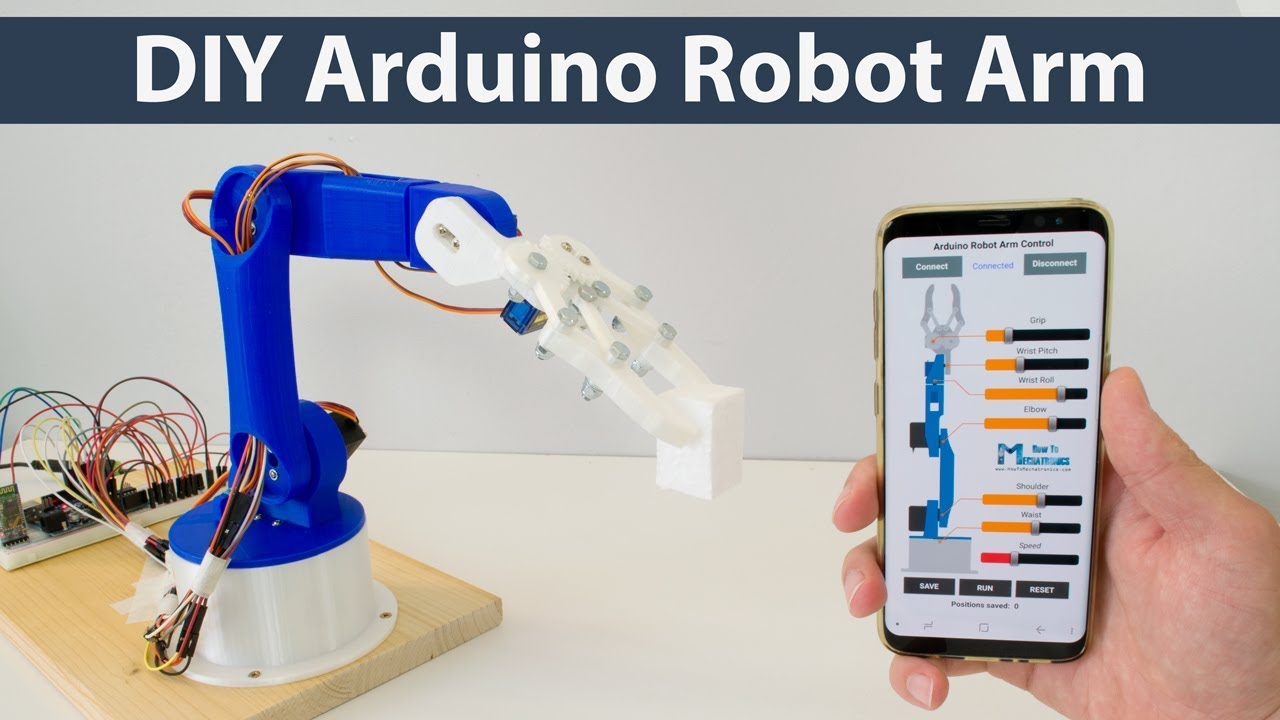
- Optional: Android app or PC interface for remote control
The best part? You can teach it movements, and it will repeat them automatically — like a mini factory assistant!
🎯 Why Build This?
✅ Hands-On Learning – Learn about mechanics, servo motors, and control systems
✅ Teachable Movements – Record and replay motion sequences
✅ Modular & Expandable – Add sensors, wireless control, or vision later
✅ Great for Portfolios – Eye-catching project with real applications
✅ Fun & Practical – Grab, move, stack, or even draw!
It’s a blend of creativity and precision — ideal for science fairs, engineering expos, and robotics contests.
🧠 How It Works
Here’s a simple flow of how your robotic arm functions:
- Servo motors are mounted at different joints (shoulder, elbow, wrist, gripper)
- The Arduino receives instructions either from a joystick, app, or pre-programmed routine
- Based on input, it calculates angles and sends signals to servos
- The arm moves accordingly, performing actions like pick and place
- In programmable mode, movements can be recorded and replayed with the press of a button
Want to make it smarter? You can even add sensors or camera vision modules later on.
🧰 What You’ll Need
| Component | Purpose |
|---|---|
| Arduino Uno/Nano | Brain of the project |
| Servo Motors (4–6) | Move the joints and gripper |
| PCA9685 Servo Driver (optional) | Control more servos with smoother motion |
| Joystick Module / Push Buttons | Manual control of movement |
| Potentiometers | For angle-based control |
| Breadboard & Wires | Wiring up the components |
| Power Supply | External 5V for servos |
| Chassis/3D Printed Frame | Structure of the robotic arm |
| Bluetooth Module (HC-05) | Optional wireless control from phone |
You can build the arm using popsicle sticks, cardboard, acrylic, or 3D printing, depending on your tools and creativity.
🧪 Features You Can Add
- 💾 Motion Recording Mode – Record a series of servo movements and replay
- 📱 Android App Control – Use your phone as a remote via Bluetooth
- 🖥️ PC Serial Command Mode – Send instructions from your computer
- 🔁 Auto Loop – Repeat programmed tasks endlessly
- 👁️ Object Detection – Add IR or ultrasonic sensor for interaction
- 🛠️ Gripper Pressure Sensor – Sense how hard it grips
🎓 What You’ll Learn
- Basics of servo control and PWM signals
- How to write efficient Arduino code for multitasking
- Designing a multi-joint manipulator
- Using record-and-replay logic
- Power management for motors
- Basics of automation logic
Whether you’re into embedded systems or industrial automation, this is a hands-on crash course!
🔧 Real-Life Applications
While this is a fun DIY version, robotic arms are used in:
- 🏭 Manufacturing & assembly lines
- 🧪 Lab sample handling
- 🍽️ Restaurant automation
- 🧱 Mini CNC or 3D printers
- 🧑🏫 Educational simulators
Your Arduino version can mimic basic movements used in these fields.
💬 Final Thoughts: Build Your Bot Buddy
The Programmable Robotic Arm is more than just a tech toy — it’s a gateway into robotics.
It teaches problem-solving, logic building, and real-world engineering — and it’s honestly just cool to see your creation come to life and move on command.
You don’t need a robotics lab — just a few motors, some code, and your creativity.
📥 Ready to Build One?
I can provide:
- ✅ Arduino Code (manual, programmable & Bluetooth mode)
- ✅ Circuit Diagrams
- ✅ 3D Print/DIY Arm Design Files
- ✅ Android App Interface (optional)
- ✅ Demo videos & testing guide
Drop a message or comment below — and let’s get your robotic arm up and waving! 👋🤖