
🔧 Build Something That Moves: DIY Arduino Stepper Motor Controller Project
Ever dreamed of building a robot arm? Or designing a camera slider that glides smoothly on its own?
If your project needs something that moves precisely — like turning exactly 90°, or taking slow, calculated steps — then you’re going to love working with a stepper motor. And the best part? You can control it with something as simple as an Arduino.
This blog will walk you through the fun (and power!) of building your own Arduino-based Stepper Motor Controller — in plain language, no engineering degree required.
🌀 Wait, What’s a Stepper Motor Anyway?
Think of a stepper motor like a super-disciplined dancer. It doesn’t spin wildly like a regular motor — it moves in steps, following exact angles.
Want it to turn 90°? It will. Want it to stop halfway? No problem.
That’s why stepper motors are used in:
- 3D printers
- CNC machines
- Robotics
- Camera rigs
- Automated toys
- Smart home gadgets
With Arduino, you can tell it how far, how fast, and when to stop — all with just a few lines of code.
🔧 What You’ll Need (Don’t Worry, It’s Simple)
Here’s your basic parts list:
- ✅ Arduino UNO (or Nano, if you like it compact)
- ✅ Stepper Motor (e.g., 28BYJ-48 or NEMA 17)
- ✅ Motor Driver (ULN2003 for small motors, or A4988/DRV8825 for bigger ones)
- ✅ Power Supply (depends on your motor)
- ✅ Breadboard + Jumper Wires
- ✅ (Optional) Potentiometer or Buttons for manual control
🔌 How It Works
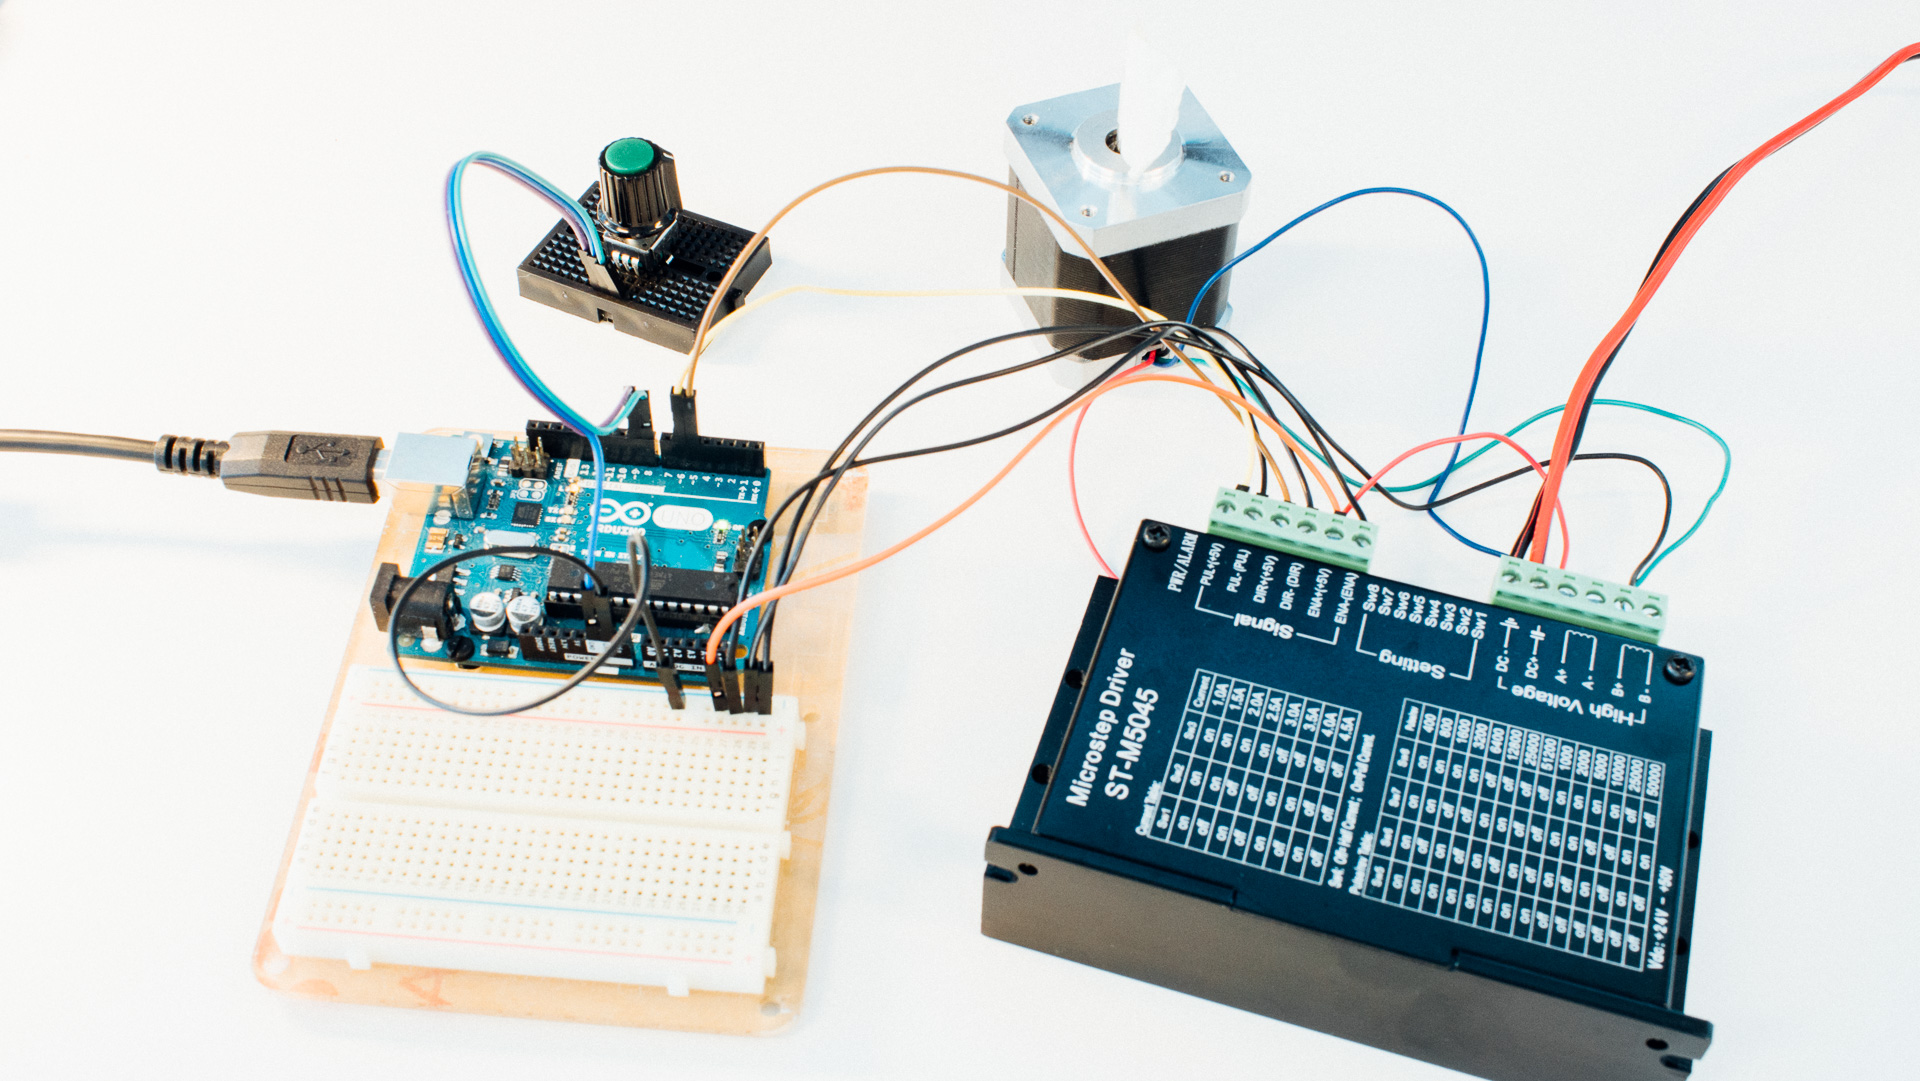
It’s like a conversation between you and the motor:
- The Arduino sends signals (step-by-step instructions).
- The driver interprets those signals and powers the motor.
- The motor moves accordingly — left, right, slow, fast, however you like.
Want to make it interactive? Add buttons to control direction or a potentiometer (knob) to adjust speed in real time. It’s literally hands-on engineering fun.
💡 Cool Ideas You Can Build
Here’s what people are making with this project:
- 🎥 A smooth, programmable camera slider
- 🤖 A robotic arm joint that moves precisely
- 🎯 A laser pointer turret (for fun or cat-chasing)
- 🧵 A DIY automatic embroidery machine
- 🧪 A lab mixer or stirrer with speed control
The possibilities are endless once you learn how to make the motor move how you want.
🧠 Learning by Doing: What You’ll Gain
Aside from the satisfaction of seeing something mechanical move because you told it to, here’s what you’ll actually learn:
- Basics of motor control
- Using drivers with Arduino
- Reading datasheets (just enough to be dangerous!)
- Writing simple but powerful Arduino code
- Power management — because motors can be greedy!
It’s a perfect beginner-to-intermediate project that bridges hardware and software beautifully.
🧪 Sample Project Flow (For Your Blog Readers)
Want to show off a quick demo? Here’s a basic plan:
- Connect your stepper motor to the driver board.
- Hook up the driver to your Arduino and power source.
- Upload a sketch using the AccelStepper library (easy and smooth motion).
- Add controls — a button, a switch, or a potentiometer.
- Customize the code to do something cool — like move in patterns or respond to input.
Boom — you’ve just built a working motion system. 🎉
💬 Final Thoughts: Why You’ll Love This
There’s something seriously satisfying about watching a motor respond to your code. It’s like watching an idea come alive, step by step.
Plus, once you’ve done this project, you’ve unlocked the door to a ton of advanced robotics and automation builds.
Whether you’re a curious student, a budding engineer, or a weekend tinkerer — this is a project that’s as educational as it is fun.
📣 Want to Try It Yourself?
Stay tuned for a full tutorial with diagrams, code, and wiring tips — or drop a comment below if you want a plug-and-play sketch to get started today!
Let’s make something that moves — on your command. 🛠️🚀