
🔁 Spin It Right: Build Your Own Automatic Coil Winding Machine
Say Goodbye to Hand-Cranked Wires Forever
If you’ve ever tried winding a coil by hand — for transformers, motors, or inductors — you already know:
It’s slow, messy, and easy to mess up.
That’s exactly why we decided to create a smart, compact solution: an Automatic Coil Winding Machine.
It’s all about precision, speed, and saving your fingers from hours of manual labor.
🧠 So, What’s a Coil Winding Machine?
In simple terms, it’s a machine that wraps copper wire around a core—perfectly, layer by layer.
Our version is powered by Arduino and motors, so it knows how many turns to make and how fast to go.
With this setup, you can wind hundreds of turns in minutes — all with the press of a button.
No more uneven coils. No more guesswork. Just perfect windings every time.
🎯 Why You Should Build One
✅ Time-Saving – Wind 500 turns in minutes, not hours
✅ Precision Control – Set the exact number of turns
✅ Uniform Winding – No overlaps or wire tangling
✅ Hands-Free – Let the machine do the work
✅ Customizable – Adjust speed, direction, and core type
Whether you’re building transformers, inductors, guitar pickups, or coil guns, this tool is a total game changer.
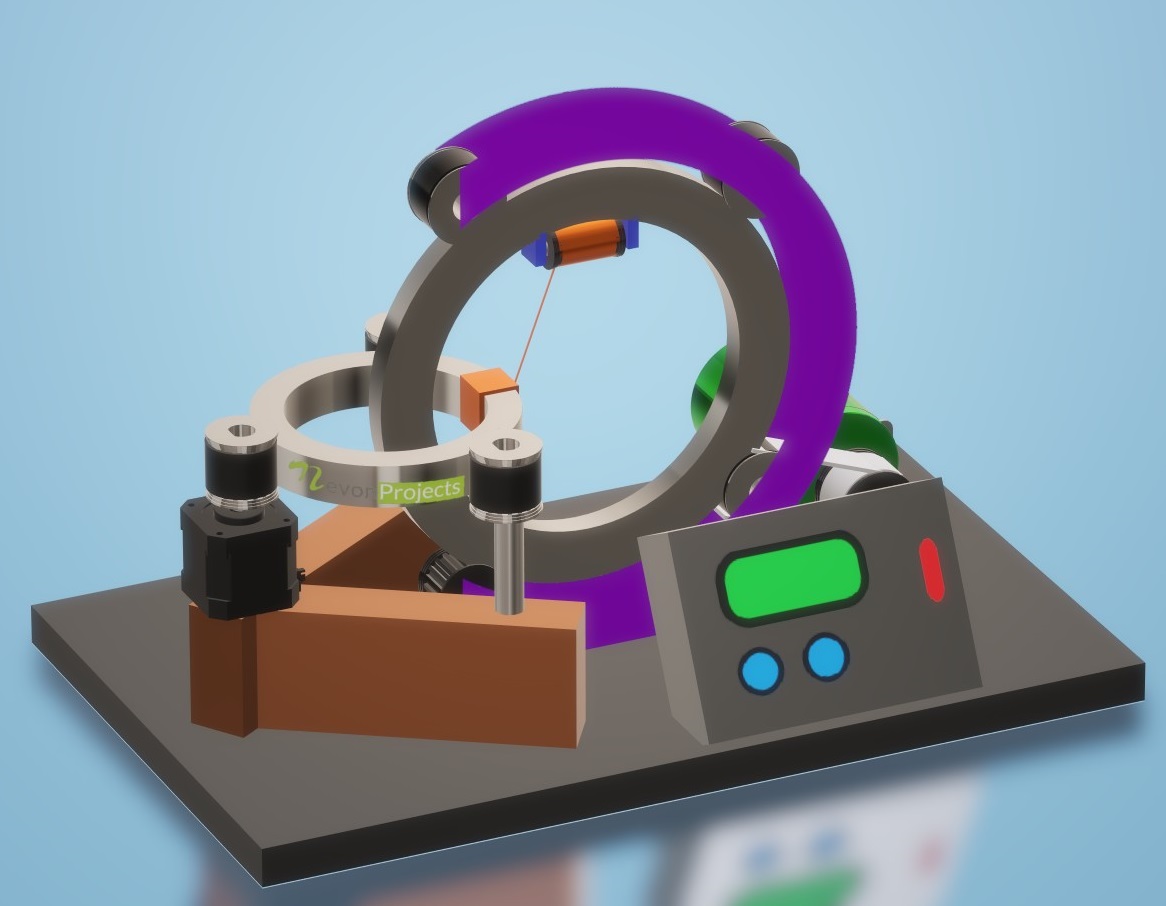
🔧 How It Works (Easy Breakdown)
The system includes:
- A stepper motor or geared DC motor to rotate the coil bobbin
- An Arduino that counts motor steps (or turns) and controls the motor
- An encoder, button, or keypad to input the number of desired turns
- A display to show turn count, speed, or progress
- An automatic wire guider (optional) that moves sideways for even layering
Just set the turn count, press start, and watch it go. When the set count is reached, the motor stops automatically.
🧰 What You’ll Need
| Component | What It Does |
|---|---|
| Arduino Uno/Nano | Controls the logic and motor |
| Stepper/DC Motor + Driver | Turns the bobbin with precision |
| Rotary Encoder / Push Button / Keypad | For turn count input or manual control |
| OLED/LCD Display | Shows progress and settings |
| Limit Switch (optional) | Detects end position for safety |
| Frame (3D printed or wooden) | Holds the coil, motor, and guides |
| Spool Holder | Feeds the wire smoothly |
You can make the machine as simple or advanced as you like.
🎓 What You’ll Learn From This Build
This project is more than just useful — it’s educational, too:
- Motor control using Arduino (including stepper and DC motors)
- Using input devices like encoders or buttons for real-time interaction
- Programming logic for counting, display, and automation
- Designing mechanical components for a functioning system
- Creating something that saves you time in future projects!
It’s a great final-year project, DIY build, or even a mini start-up idea for electronics labs.
✨ Bonus Features You Can Add
- ⚙️ Adjustable Speed Knob – Control winding speed on the fly
- 📦 Auto Wire Layering System – Move the guide rail sideways in sync
- 🧠 Memory Function – Resume where it left off after power cut
- 📱 App Control – Connect via Bluetooth or Wi-Fi
- 📊 Data Logging – Store winding counts for each coil type
🛠️ Real-Life Applications
- 🧲 Transformer winding (power or audio)
- 🔊 Speaker and mic coils
- 🔋 Custom inductors for power circuits
- 🎸 Guitar pickups
- 🔬 Coils for science experiments
- 💡 DIY wireless chargers and Tesla coils
Perfect for makerspaces, colleges, and repair workshops.
💬 Final Thoughts: A Maker’s Must-Have
This Automatic Coil Winding Machine isn’t just a cool DIY — it’s a time-saving powerhouse that levels up your electronics game.
From transformer builders to RF tinkerers, anyone working with coils will wonder how they lived without it.
Best of all, it’s easy to build, affordable, and endlessly customizable.
📥 Ready to Build One?
Want the full build kit?
- ✅ Circuit diagrams + component list
- ✅ Arduino code for automatic winding
- ✅ Frame design ideas (wood or 3D print)
- ✅ Tips to prevent wire breaks & jams
Drop a comment or message and I’ll send you everything to get started winding like a pro. 🔁💡